Cooking in nature, without the convenience of kitchen tools, is not only a vital survival skill but also an innovative way to enrich your outdoor adventures. This practice demands creativity and resourcefulness, challenging you to use the natural environment to your culinary advantage.
Whether it’s skewering your meal on sticks, utilizing the heat from a pit, leveraging hot ashes, or cooking atop searing rocks, these four ingenious methods will guide you in transforming simple ingredients into delicious meals, deepening your connection with nature.
Table of Contents
Cooking with Sticks (Skewers)
Selecting the right kind of sticks for cooking is crucial for a successful meal in the wilderness. Ideally, you want to find green wood from non-toxic trees such as oak willow, or maple. Greenwood, being fresh and moist, is less likely to catch fire. You want to avoid resinous trees as the sap can leave a bitter taste on the food.
Make sure the sticks are sturdy enough to hold your food and long enough to keep your hands safely away from the heat source. Sharpen one end of the stick for easier skewering of the food.
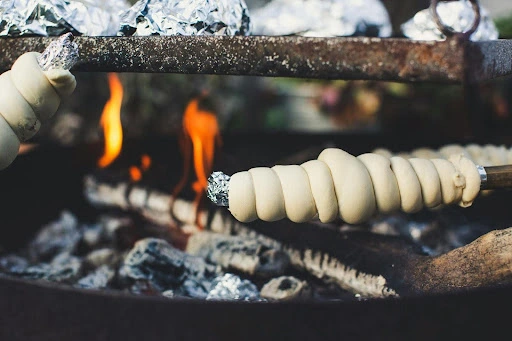
Skewer cooking is versatile, suitable for a variety of foods including meats (chunks of beef, chicken, fish), vegetables (bell peppers, zucchini, onions, tomatoes), and even bread dough can be twisted around sticks and roasted over an open flame.
Here’s a guide on how to prepare and cook food using sticks:
- Select and Prepare Your Sticks: Look for green branches about an arm’s length. Sharpen one end with a knife. Remove any excess bark if you want to avoid getting it into your food.
- Prepare Your Ingredients: Cut your meats and vegetables into chunks that will easily fit on your sticks. If you’re using dough, roll it into a snake-like shape that can wrap around the stick.
- Skewer the Food: Thread your ingredients onto the sharpened end of the stick, leaving some space between pieces to ensure even cooking.
- Cook Over an Open Flame: Hold the stick over the open flame or embers, rotating it slowly to cook all sides evenly. The cooking time will vary depending on the heat of your fire and the type of food on your skewer.
- Enjoy Your Meal: Once your food is cooked to your liking, carefully remove it from the stick and enjoy a delicious meal connected with nature.
Many of us have experienced this type of cooking, whether roasting marshmallows or hotdogs. It remains one of the easiest ways to cook food without any gear.
Digging a Pit (Earth Oven)
Cooking on the earth involves slow-cooking food using heat from hot rocks and coals buried in the earth. This method infuses the food with a distinct, earthy flavor that’s hard to replicate with modern cooking methods.
To start, select a location away from flammable objects and, ideally, in sandy or loamy soil to make digging easier.
First, dig a pit about 3 feet deep and wide enough to accommodate the amount of food you plan to cook, along with adequate space for hot rocks and coals. Line the bottom of the pit with large rocks and then heat them with a wood fire. Once the rocks are hot and the fire has burnt down to coals, remove excess ash.
Wrap the food in layers of leaves or wet burlap to protect it. Large cuts of meat, whole poultry, and root vegetables are particularly suited for pit cooking due to their size and density. Place the food on top of the hot rocks, cover it with more hot rocks, and then bury everything under a thick layer of soil to trap the heat.
The cooking time varies depending on the size and type of food; however, as a general guide, large meats may take several hours to cook thoroughly. To check for doneness, carefully uncover the pit to assess the food, then re-cover if more cooking time is needed.
Hot Ash Cooking
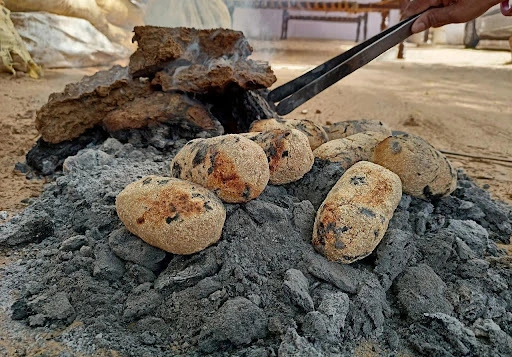
Cooking in hot ashes is not only simple but also harnesses the primal essence of fire to cook meals directly within the embers of a wood fire.
To begin this method, build a fire using hardwood, which burns long and hot, providing a steady supply of hot ashes. Softwood tends to burn very quickly thanks to the resinous qualities in the sap.
Allow the fire to burn down to a bed of glowing embers and ash, making sure there is a substantial amount to fully envelop the food.
Before placing your food in the ashes, it must be adequately prepared to protect it from direct contact with the ash and to retain moisture.
Wrap the food tightly in natural materials such as leaves (banana leaves work well) or, if available, encase it in mud or clay which creates a natural oven around the food.
Aluminum foil can also be used for a more contemporary and less labor-intensive method. Make sure you get the BBQ foil or heavy-duty foil so it doesn’t get any holes burned through it.
The wrapped food is then nestled into the hot ashes. You want to completely cover the food with ashes for even heat distribution.
Monitoring the cooking time is important, as it varies significantly depending on the type of food and its size. Leaving it for too long leaves the chance of the food drying out.
Generally, vegetables will cook faster than meat. For example, potatoes may take around 45 minutes, whereas a whole chicken might need upwards of 2 hours. Once the food is cooked, carefully remove the food from the ashes, fully unwrap it, and enjoy this uniquely prepared food
Cooking Over Rocks
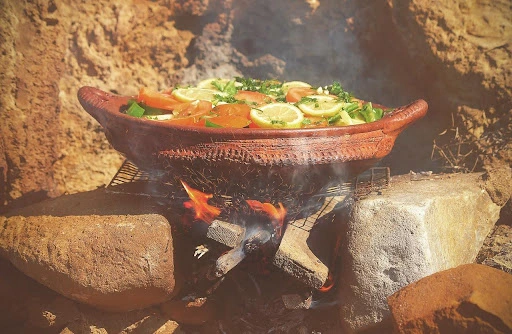
Cooking over rocks is a technique that utilizes the natural heat retention properties of stones. The process starts with selecting the right type of rocks; sedimentary rocks like sandstone or slate can contain water and are prone to exploding when heated.
Instead, look for dense, dry igneous rocks such as granite. You can use rocks that are close to water but if they have been submerged then there is a good chance the heat will cause it to explode.
You’ll want to begin by creating a fire and surrounding it with your chosen rocks, allowing them to heat up for an hour or so. This method is particularly advantageous for cooking delicate foods like fish and flatbreads, which benefit from the steady, even heat that rocks can provide.
Once the rocks have reached an optimal temperature (I will splash water on them and see if they sizzle), carefully arrange your food on them. For fish, this means placing it directly on the rock surface, possibly wrapped in leaves for added flavor and moisture retention.
Flatbreads can be laid flat on the rocks, turning once to ensure even cooking on both sides. If the heat becomes too intense and things start sticking, move the food to cooler parts of the rock or by spacing the rocks further from the fire.
This method is the one you have to be ultra-safe around. Always choose rocks from a dry environment, and heat them gradually to prevent sudden temperature changes that could cause them to crack or explode. More often than not they will just split and break but there is a chance they can explode so it’s best not to stand near it for the heating process.
Final Thoughts
Cooking in the wild using the primitive method of heated rocks taps into our ancestral roots, reminding us of the simplicity and joy found in connecting with nature. Though it may seem like a challenge compared to modern methods, it is a testament to human ingenuity and adaptability throughout history.
As we revel in this experience, practice respect for the environment by leaving no trace of your activities. This means ensuring food remnants and cooking materials are removed or dispersed away from campsites. You never know when a curious animal will come by asking for scraps.

