Understanding Taxidermy
Taxidermy is truly an art form, and it dates back to ancient times. The art form holds profound significance in both preserving and showcasing the beauty of the harvested animal. Through craftsmanship, taxidermists capture the animal and preserve it for future generations to admire. It serves as a means to celebrate the animal and remember the hunt. Depending on the animal, some hides and furs can be used to make clothing and other things. Some taxidermy can be done yourself this will be an easy guide to DIY turkey tail mounts.
Easy and Quick Set Method
Step 1: Gather Your Materials
To begin your turkey tail mount project, you’ll need the following materials:
- Turkey tail feathers
- Razor blade and or sharp knife
- Wire brushes
- Borax
- Auto body filler (Bondo)
- Plastic for mixing
- Trash bag
- Ammo boxes or heavy weights
Step 2: Preparing the Tail Feathers
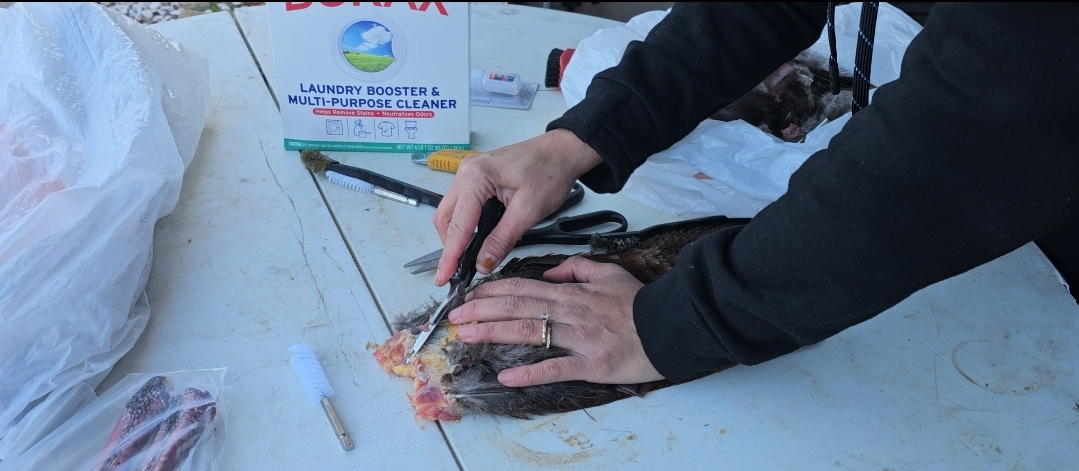
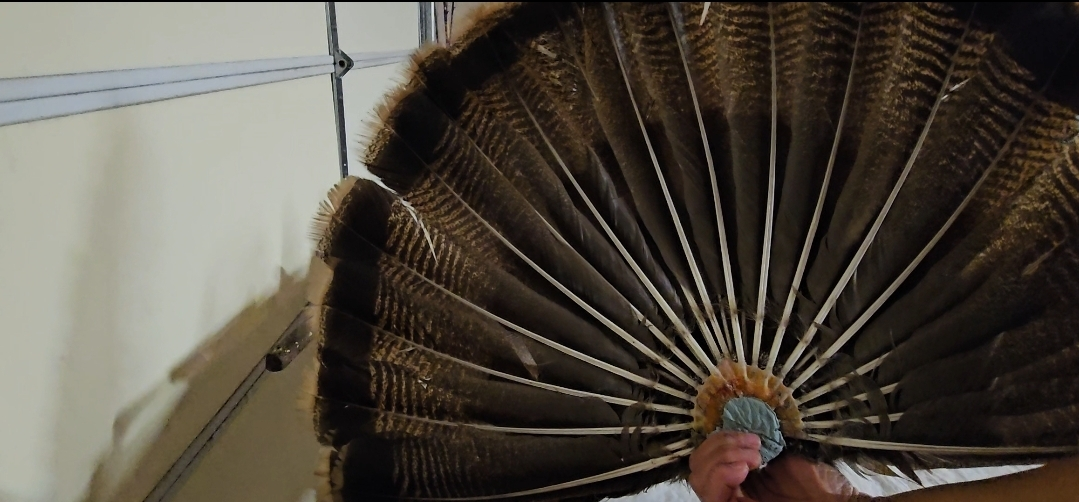
Start by carefully removing the tail feathers from behind the fan and discarding any excess flesh. Use a razor blade or sharp knife to peel back the top layer of skin, exposing the quills.
Step 3: Cleaning the Feathers
Next, remove the bulk of the meat from the feathers by cutting underneath the quills. Be sure to avoid cutting the fascia tendon tissue that connects the quills together. Use a razor blade to remove any excess grease and meat from between the quills. You can also use a wire brush to help remove the flesh and tissue from the end of the tail.
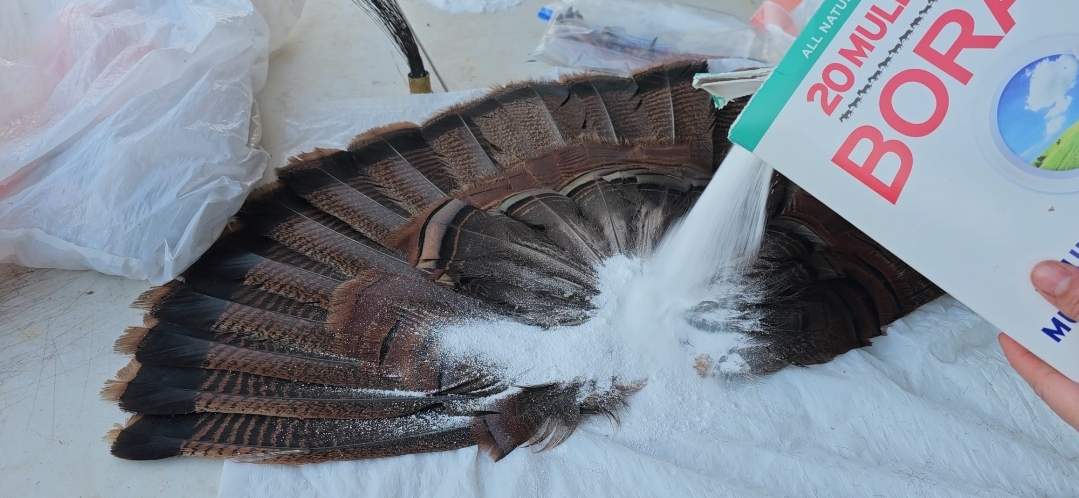
Step 4: Applying Borax
Once the feathers are clean, apply a generous amount of Borax to all the exposed flesh areas. Ensure that the Borax coats the feathers and skin well to aid in drying and preservation. The Borax helps to kill mites and dry out any remaining flesh.
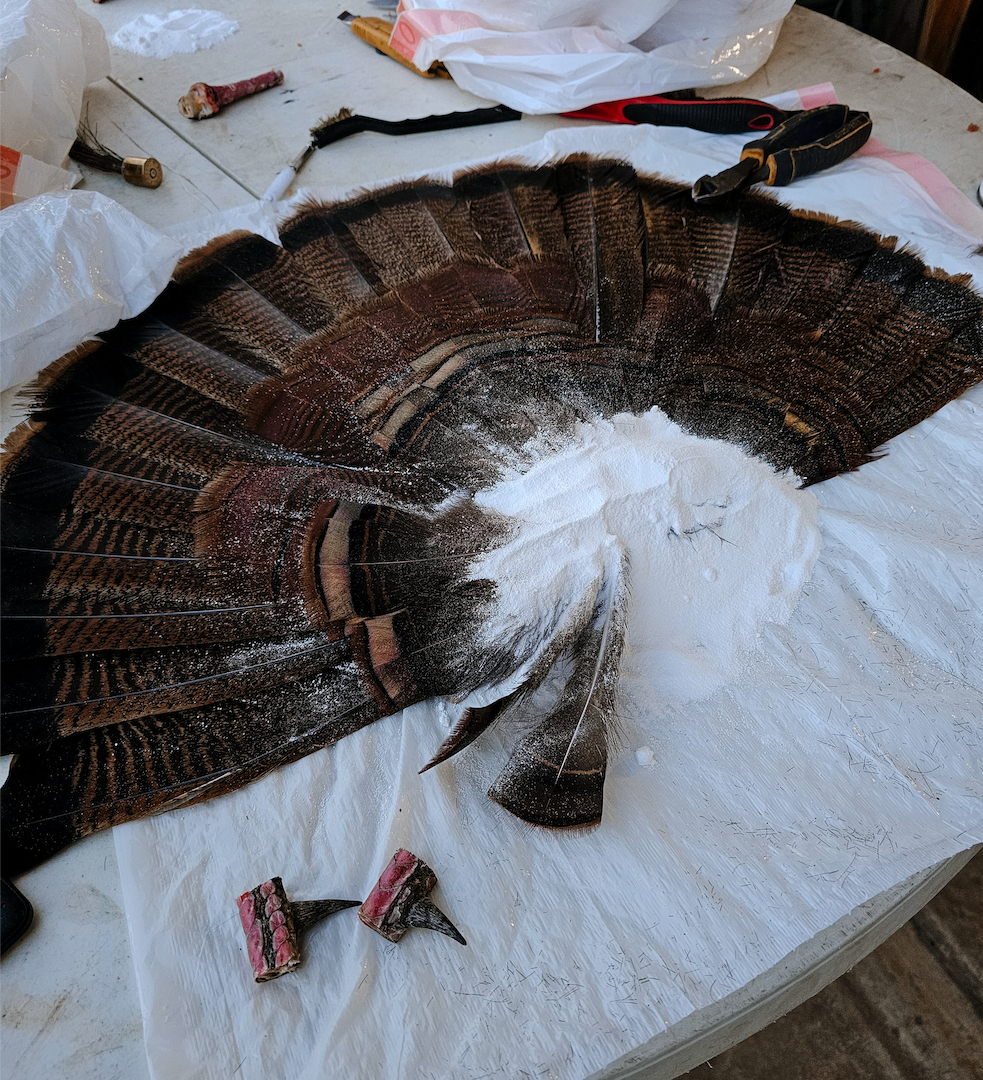
Step 5: Drying
Allow the Borax to sit overnight or for at least two hours to dry out the feathers and kill any pests. The following day, dust off the excess Borax and prepare the feathers for mounting.
Step 6: Mounting the Feathers
Mix the auto body filler according to the manufacturer’s instructions and apply it to the underside of the feathers where the quills are touching. Also, apply filler underneath any skin flaps to hold them down. Use a trash bag under the fan; the auto filler will easily remove it from the trash bag. I use ammo boxes to keep the fan in place while the filler sets.
Step 7: Final Touches
After the filler has cured, your turkey tail mount is ready to be displayed. Use a spoolie brush to fan out the feathers and remove any remaining borax residue.
Creating your DIY turkey tail mount is a rewarding way to commemorate your hunting adventures. Not only does it provide a visual reminder of your success in the field, but it also allows you to showcase your craftsmanship and honor the animal.
Drying Method
If you do not want to use a quick-set method, you can dry out the turkey fan. This process takes about two months, depending on how well you clean the meat and flesh. Thoroughly drying the turkey tail is a critical step in the taxidermy process to prevent decay and ensure the longevity of the mount. Moisture trapped within the feathers or skin can lead to bacterial growth and deterioration over time, compromising the integrity of the mount. Not to mention the smell! Therefore, it’s essential to properly clean and use the correct drying techniques.
Different Drying Agents and Their Applications:
Borax: Borax is a commonly used drying agent in taxidermy due to its ability to absorb moisture and inhibit bacterial growth. To apply Borax, sprinkle a generous amount onto the exposed flesh areas of the tail and rub it in thoroughly. Ensure that all surfaces are evenly coated with Borax to facilitate thorough drying and preservation.
Salt: Salt is another effective drying agent that helps draw moisture out of the feathers and skin. To use salt, create a mixture of salt and water and apply it to the tail, focusing on areas with excess moisture. Allow the salt to penetrate the feathers and skin for several hours before rinsing it off and allowing the tail to air dry completely.
Commercial Drying Powders: There are also commercial drying powders available specifically designed for taxidermy purposes. These powders often contain a combination of absorbent materials and preservatives to ensure thorough drying and long-term preservation of the mount. Follow the manufacturer’s instructions for application and drying times to achieve optimal results.
By using these different drying agents and techniques, you can effectively remove moisture from the turkey tail and preserve for display. Remember to allow sufficient drying time before proceeding with mounting if using this method. This will ensure the best possible outcome for your taxidermy project.
Shaping and Mounting
To ensure your turkey tail mount looks fun, shaping the feathers properly is key. Start by arranging the feathers in a natural fan shape, paying attention to the curvature and spacing. Use your fingers or a soft brush to gently manipulate the feathers into place, creating a smooth and symmetrical appearance. To help fluff the tail, consider washing it and using a hairdryer on a low setting to fluff up the feathers and add volume.
Place the tail on a display board or cardboard surface. Position the tail on the board, ensuring it is centered and aligned correctly. Use pins or small nails to secure the feathers to the board. Once mounted, allow the tail to dry completely before displaying your finished piece. Note, if not fastened correctly it could cause your fan to shrink or restrict, in turn distorting the shape.
Personalizing the display of your turkey tail mount adds a unique touch and makes it truly your own. Consider incorporating personal mementos or memorabilia from the hunt, such as shotgun shells, hunting tags, or photos, to create a meaningful and visually engaging display. Whether you choose to keep it simple or get creative with additions, adding your personal flair to the display will make it a cherished piece for years to come.
Turkey hunting is not just about bagging a gobbler; it’s also about preserving the memory of the hunt. One way to immortalize the experience is by creating a DIY turkey tail mount.
Additional Resources:
I recently filmed a video of how I preserved my own turkey tail on YouTube. Watch here: