Modern conveniences have left people yearning to get closer to the natural world. Cities have dulled our senses and the majority of people may find themselves clueless when out in the bush.
These times we live in are certainly different, and that’s not necessarily a bad thing; However, learning some basic bushcraft skills can help you regain that connection to nature and teach you a few things in the process.
Luckily, you don’t need any previously learned skills to start diving into bushcraft projects. This guide will show you some of the simplest bushcraft techniques that you can learn today using items that you probably already have in your camping kit.
Table of Contents
What is Bushcraft?
Effectively, bushcraft is the means to be comfortable out in nature. It’s all about providing for yourself by creating different tools using nothing but the resources around you.
Bushcraft is meant to decrease your reliance on modern conveniences by showing you how to thrive with minimal gear while using your creativity to craft anything you need.
There is no “failing” at bushcraft, although some would say that it’s a failure if you have to go home early because you are either cold or starving. It’s a continuous learning experience meant to humble you and eventually prove that it’s not so difficult to be comfortable out in the wild.
Bushcraft Vs. Survival
To some, bushcraft and survival go hand in hand; However, there is a distinct difference between the two. Survival is all about meeting your needs in the short term. This can include warmth, hydration, food, and shelter. While you may use bushcraft techniques to help you survive, they are not the same thing.
Bushcraft is usually what you do after you meet all of your survival needs. For example, in a survival situation, you might find a hovel or cave to hunker down in to get through the first few nights. The bushcraft equivalent is when you build a shelter to meet your long-term needs.
Instead of surviving, bushcraft allows you to live in nature. Some projects can take a long time to complete, far beyond the time frame you would need for survival.
What Do You Need to Get Started?
Creating your own tools is the very definition of bushcraft, but novices might not know where to begin to craft their own tools and structures. For this, you can “cheat” a little and make your life easier by using tools that you’ve purchased or brought from home.
Tools
High-quality tools will make your bushcraft experience less of a slog and more fun. You’ll want a variety of cutting tools for processing wood since that is primarily the material you will be working with.
Here is a list of tools that you’ll want to bring with you for your next bushcraft excursion:
- Knife
- Axe/Hatchet
- Saw
- Flint and Steel
- Ferro Rod
- Whetstone
- Spoon knife (for carving)
- Hand drill
Of course, you can craft most of these tools using natural resources, but if you’re just beginning then having these items already made will give you a leg up on your projects.
Best Types of Wood to Use
Wood will be the primary resource you’ll be using to create your bushcraft projects. Stone will be a close second as you combine the two to create tools that can help you build things.
The type of wood that you use does matter. Some varieties are physically strong while others are rot-resistant in the presence of a lot of moisture. Luckily, most types of forests have plenty of choices when it comes to building materials.
For fire building, you want resinous wood that can take a spark easily. These varieties are filled with a waterproof resin that will burn hot, even in the rain. Look out for spruce and pine species if you are looking to get a fire going.
For construction, Eastern White Cedar is light, strong, and rot-resistant making it ideal for building shelters. Oak trees are great for furniture as the wood is sturdy and heavy, creating long-lasting items.
If you want to make some utensils, plates, and bowls look for birch trees as they are water-resistant. This waterproof characteristic makes them ideal for crafting water-holding vessels and eating utensils.
5 Bushcraft Projects to Get You Started
Bushcraft projects can be as simple or as complex as you want them to be. As you gain experience you can add your own ideas and personal flare to your projects. This list is meant to be approachable as it can be completed by anyone at any skill level.
Experiment with different materials and designs until you find the best fit for your skillset. If the project doesn’t pan out as you wanted, don’t get frustrated. Simply dust yourself off, take a break, and start again. Being out in the woods should be a fun experience, not one where you tear the hair out of your head.
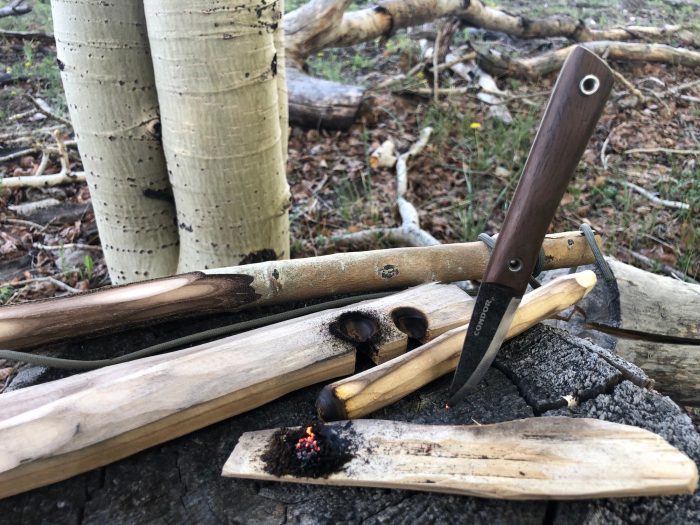
1. The Bow Drill
A bow drill is a tool to help you start a fire. Instead of delivering a flame like a lighter would, the bow drill helps you create a small ember using friction. The ember is then deposited into a tinder bundle and given oxygen to ignite it.
Five components need to be used to create the bow drill set: the bow, string, spindle, board, and hand grip. The drill is spun using the handhold and strong which creates friction on the board.
Choosing the right wood is imperative for this project. Wet or punky wood won’t create the heat needed from the friction you’ll be applying. Cedar, spruce, basswood, and balsam fir works best for this project.
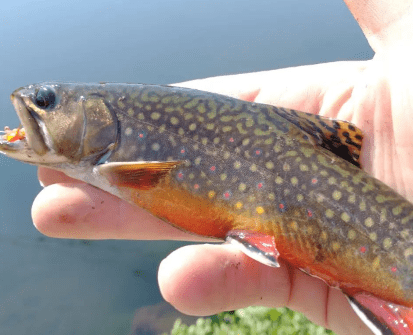
2. Crafting Fishing Hooks
Crafting fishing hooks is the best way to get some fish on your plate. There are a variety of designs that you can craft with the materials that are around you.
Wood and bone are the most common materials used in creating fish hooks. The end goal is to create a pointed object that the fish will swallow. These hooks will get lodged in the throat or stomach allowing you to pull the fish in.
The more common types of hooks you can make are fishing gorges, single and double-pointed hooks, and finally, the composite hook which resembles a lot of modern hooks.
Learn how to craft your own primitive fishing hooks using this step-by-step guide.
3. Carving a Cup
Traditionally called a “kuksa” which originated from Finland, these wooden cups are created from birch burls and can last for years as long as you take care of them.
To craft this cup, you will need a few tools to help you carve out the wood. These cups are a labor of love since you will experience some hand cramping while carving out the bowl.
One tool you’ll need is a hook knife which is curved to help you carve a concave, round shape to form the inside of the bowl. Otherwise, you’ll need an axe and chisel to relieve the birch tree of its burl and some sandpaper to smooth out the rough edges. Additionally, you can use oak or maple, really any wood that is non-toxic to humans.
Learn how to carve your wooden kuksa cup here!
4. Building a Cooking Tripod
A cooking tripod is a versatile tool to have in the wild. It can be used to hold a pot over a fire, to hang meat for slow cooking, and even to make a hammock-style chair. It is incredibly easy to make and only requires three trees and some cordage to lash it all together.
The process begins as you search for three saplings about wrist size that can be tied together to form the tripod. From there you can customize it for cooking or as furniture.
For example, once you build the tripod you can attach a grill in between the three legs to create an elevated cooking platform. You can then cover the tripod in coniferous boughs to create a wilderness smokehouse.
With a few tweaks you can even turn it into a usable freestanding chair. If you’re just starting as a bushcrafter, a tripod is a simple way to get your feet wet.
5. Building a Lean-To Shelter
The nice thing about a lean-to shelter is that they can be expanded upon. In a survival situation, a debris shelter will help you for the short term, but a lean-to is one step closer to creating your very own wilderness home.
You’ll need a saw, knife, and some cordage to successfully build a lean-to. Use dead-standing trees to create the sturdy ridgepole on which the back wall will rest. From there you can fill in the back wall with debris from the forest floor or a large tarp that you bring with you.
To expand upon the shelter, extend the roofline above you and build out some walls. This will provide a barrier against predators as well as a wind block if the weather turns south.
To build your lean-to shelter, follow this guide here.
Final Thoughts
These projects are just the tip of the iceberg when it comes to bushcraft. You could easily spend years learning the ins and outs of how to take advantage of the natural world using creativity and a bit of ingenuity.
With a bit of practice and a lot of patience, you will increase your bushcraft confidence, allowing you to take on harder projects. Mastering these skills will set you on the right path to living indefinitely in the woods.